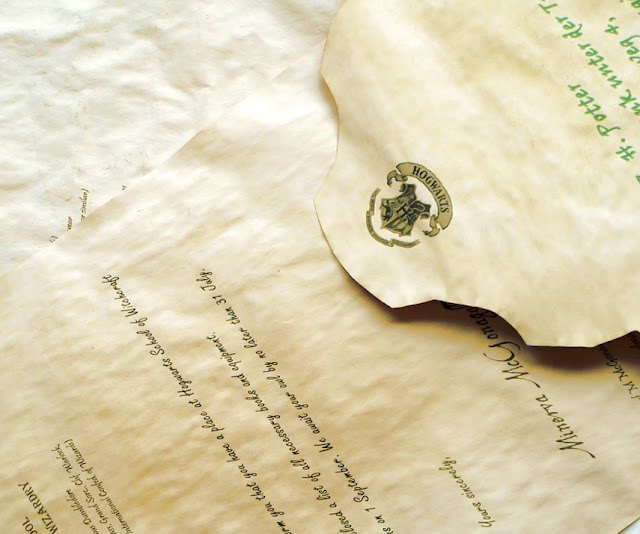
Want to make a Harry Potter Hogwarts letter?
Here’s what you need:
3 sheets of white, off white or yellowish paper;
Green and black pens
Glue
Scissors
And a Printer
If you want to make a wax seal you’ll also need:
A red candle which is red on the inside as well
A lighter
A potato
A knife and or carving tools
A transparent sheet
How it’s done:
Print the template of the
envelope onto one of the sheets and cut it out. Print the letter onto the other
sheets. You can find the links to everything here (female version), here (male version) and here (envelope). Cut out the envelope.
If you used white paper then
now’s the time to dye it. Make two cups of extra strong black tea and let it
sit for 10 minutes. Pour a little bit into a tray, add the paper and cover it
with tea. I used 3 trays for all the sheets but you can do it one after
another. They now need to soak for about 10 to 20 minutes. You can also use
coffee for this.
Preheat the oven to 350 f and
carefully remove the paper. Put it on a baking tray lined with parchment paper
and remove any excess liquid. If you’re underage, please make sure that your
parents are fine with this. They might want to help you with this whole step and
later with the wax seal.
Let it bake for 10 minutes
while watching it. The last thing you want is for your kitchen to burn down.
Trust me on this one. Take the paper out and iron it to make it less wavy.
Take the envelope and put it
right side down onto your working surface. Fold in all four flaps and open them
again. Now take the two side flaps and put a stripe of glue on both lower edges.
Fold the lower flap up and press. Watch out that it doesn’t stick to the other
side of the envelope and let it dry.
Take a black pen and write the desired name onto your letter.
With a green pen write the name, room and address on your envelope. For the room write something like: The messy room, the big room, the first room on the right, the blue room or anything that makes the place special.
With a green pen write the name, room and address on your envelope. For the room write something like: The messy room, the big room, the first room on the right, the blue room or anything that makes the place special.
Fold both letters individually,
make them as flat as possible, and put them into the envelope. It’s a tight
fit, but it’ll work.
You can now print out a seal,
draw one or make one out of wax. The latter will take some time and effort but
it will be worth it!
Cut out a round platform in the size of your liking. Now carve using your sketch as a template. This can be done with a plain knife. For me it was easier to work with carving tools I had lying around. Please guys, be careful here!
Light your candle and let it burn for a bit. We want
the wax to really liquefy. It would be perfect to use a bigger candle, because we could collect a lot of wax in it, but I didn’t have one which
was red on the inside. So I had to improvise. If you do have one, just dig a
little ditch from the center of the candle to the outside to allow the wax to
flow more easily.
Take the candle and drip some wax onto a transparent
sheet. Try to get a big enough circle. You can always move the wax around with
a knife or the candle itself. But be careful. Wait a couple of seconds. Now
take your self-made stamp and gently place it in the wax. Let it sit there for about
a minute and remove.
You don’t like how the seal turned out? Just wait until you have enough liquid wax and do it again.
You don’t like how the seal turned out? Just wait until you have enough liquid wax and do it again.
When you’re finally happy with the
result, simply remove it from the sheet. You can now carefully break of any
excess wax and smooth the edges with a flame until you like how it looks. Close
your envelope, glue it shut if you want to. That makes it easier to attach the
seal. Now drip some wax onto it, place the seal and press gently.
Welcome to Hogwarts, everyone!
 Feed
Feed


Thanks so much for this. My daughter is turning 11 and I made to surprise her. Didn't have a candle but a red crayon worked well (melted in oven while drying paper).
ReplyDeleteThat was a great help to me , thanku so much... I wanted one letter, ♥️
ReplyDeleteVery nice work!
ReplyDeleteVery cool!
ReplyDeletethis worked great for me my sister and my friend to "cosplay" as harry potter characters! tysm :D
ReplyDelete